

PorcelPave is a trade range name for 20mm outdoor porcelain paving, supplied in the UK through builders’ merchants and paving retailers rather than sold directly to homeowners. It appears on the market in stone-effect and distressed finishes, in the standard outdoor sizes.
The useful thing to understand about it is not the brand. It is that almost every 20mm outdoor porcelain slab in this part of the market behaves the same way once it is on the ground.
The brand name has very little to do with whether the patio is still flat in five years.
What decides that is the slip rating you were sold, whether the slabs were trimmed to size after firing, and one five-minute step during installation that roughly half the trade skips.
What PorcelPave actually is
The name shows up as a product family carried by paving suppliers, with individual lines named by colour and effect. Quartzite Beige and Street Cloud are two that circulate, the first a stone-effect slab and the second a distressed finish.
It is listed at 20mm thick, which is the standard format for outdoor porcelain in the UK and Ireland. Product codes in the range follow a pattern that suggests 600x600mm units, though you should read the datasheet rather than decode the SKU.
Here is the part the marketing will not tell you. Outdoor porcelain in this price band comes from a fairly small number of factories in India, Spain, Italy and increasingly China, and the same body is sold under a long list of range names.
Two slabs with different brand stickers can come off the same production line with the same water absorption figure, the same thickness tolerance and the same surface texture. That is not a criticism of PorcelPave specifically. It is how the category works.
So the honest advice is to stop comparing range names and start comparing datasheets. The four numbers on a datasheet tell you more than any amount of range branding.
Why the brand name matters less than the merchant suggests
Porcelain is a vitrified material. It is fired until the body is close to glass, which is why its water absorption sits below 0.5% and why it does not stain, fade badly or soak up moss the way concrete and some natural stone do.
Those properties are inherent to the material, not to the supplier. Any slab that genuinely meets the porcelain standard will be frost-resistant and effectively non-porous, whatever is printed on the pallet.
Where ranges like PorcelPave genuinely differ from one another is in finishing, consistency and the honesty of the slip claim. A cheap slab can arrive with size variation, visible firing bands across the face, and a slip rating that was tested in a way that flatters it.
That is what you are actually buying when you pay more. Not a better material, a better-controlled one.
Slip resistance is the specification people get wrong
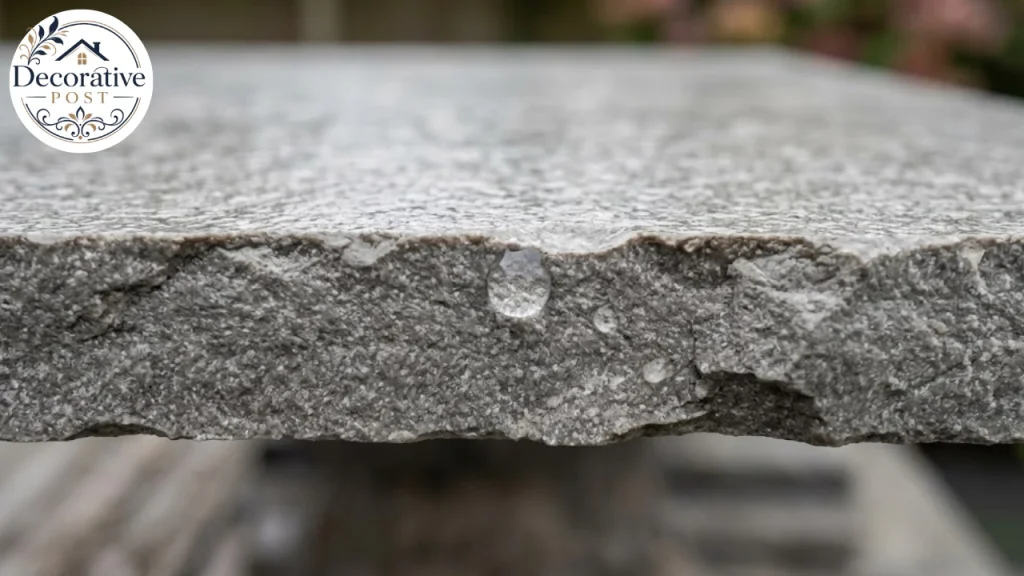
Nearly every outdoor porcelain range on the market is advertised as R11. The industry has settled on that figure as shorthand for anti-slip, and most buyers now treat R11 as a box ticked.
The ramp test behind the R scale runs from R9 to R13, and it was developed for indoor floors. There is no standardised outdoor slip test, which is a problem the trade tends not to mention.
Pavingexpert, the long-running technical reference for UK hard landscaping, takes a firmer line than the retailers do. It advises avoiding anything rated R10 or below, recommends R12 or higher for external use, and describes R11 as borderline.
The pendulum test gives a more reliable picture, and it reports a Pendulum Test Value on a scale of 1 to 100. The HSE’s working minimum for floors in public places is a PTV of 36, wet and dry.
An R11 slab can return a PTV anywhere from roughly 34 to 51. Which means an R11 rating is compatible with a slab that fails the HSE threshold, and also with one that clears it comfortably. The rating alone does not tell you which you have.
Many UK suppliers now recommend PTV 40 or above outdoors, which builds in a sensible margin. If a merchant can give you a wet PTV figure rather than only an R number, that is the one to ask for.
Where this bites hardest is on steps, around pools, at the foot of a door, and on any slope. A slab that is fine across a flat terrace becomes a genuine hazard on a tread.
Rectified or not, and why your joints depend on it
Rectified slabs are mechanically trimmed to exact size after firing. Unrectified slabs are not, and can vary by one to three millimetres across a batch.
That variation has to go somewhere. On site it goes into the joints, which the installer has to open and balance across the field so the error does not accumulate into a visible drift.
Balanced joints work, but they are a compromise, and they undermine the thing most people want from porcelain in the first place: a tight, uniform, crisp grid. They also slow the installer down, which shows up in the labour cost.
The other quality marker to look at is banding. If you can see faint stripes of tonal variation running in one direction across the face, the firing was less well controlled.
Banded slabs are still perfectly usable in a field of paving. They become a problem on steps and copings, where the cut edge is on display and the banding reads as a defect rather than as texture.
Thickness: what 16, 20 and 30mm can each carry
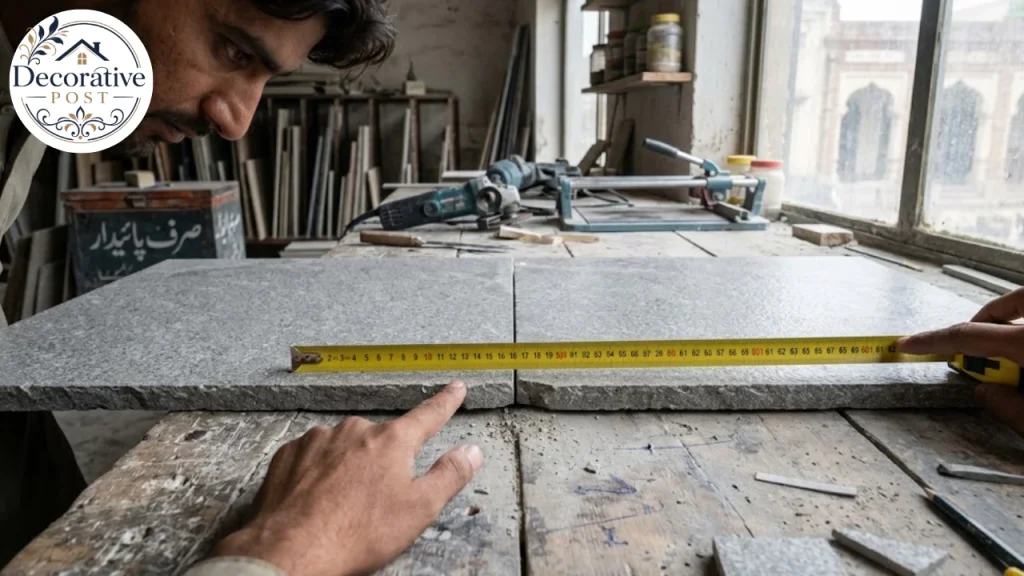
Outdoor porcelain comes in three practical thicknesses, and they are not interchangeable.
16mm is for sheltered pedestrian use. Balconies, terraces, small patios, and raised pedestal systems that are specifically rated for it. It is lighter to carry, which matters on an upper floor.
20mm is the general-purpose patio format, and the one PorcelPave is supplied in. Patios, paths, dining areas, steps, pool surrounds, all on a full mortar bed over a compacted sub-base.
30mm is the vehicle format. Driveways and crossings need either 30mm on a properly engineered base, or 20mm fully bonded to a reinforced concrete slab that is carrying the load itself.
The crucial point is that thickness and base work together, and the base wins. A well-bedded 20mm slab will outlast a badly bedded 30mm one every time.
The failure that defines this material
Porcelain’s great virtue is also its installation problem. Because the body is vitrified, there are no pores for cement mortar to grip into.
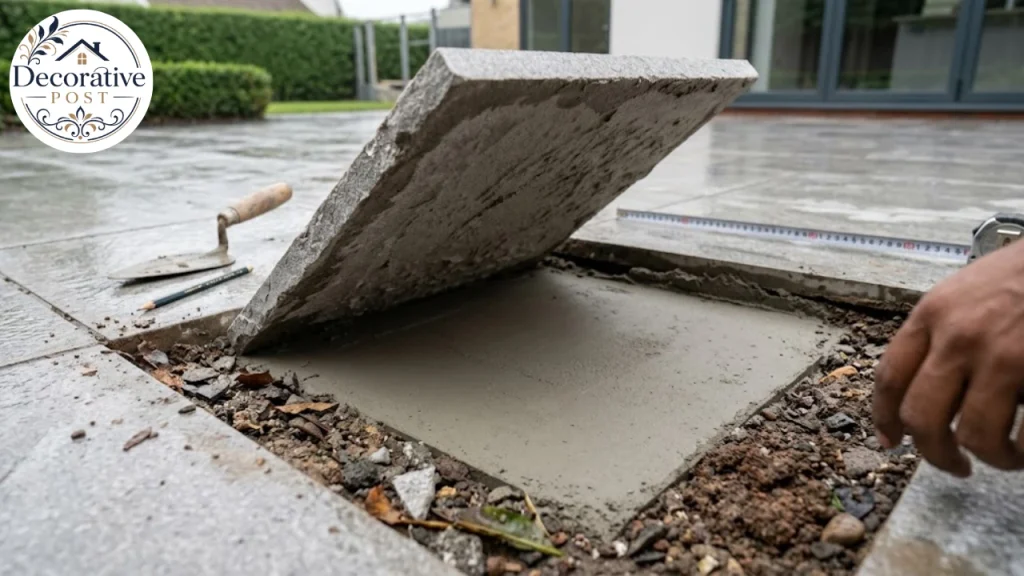
Lay a porcelain slab straight onto a mortar bed and the mortar cures against what is effectively a sheet of glass. There is no chemical bond. The slab is held by its own weight, a little friction, and some temporary suction.
That suction is what fools people. The patio looks perfect on handover and stays that way for months, which is long enough for everyone to assume it worked.
The sequence from there is consistent enough to be predictable. Through the first six months, nothing. Between six and twelve months, slabs start to rock slightly and sound hollow when you walk across them.
By the second year, corners are lifting, joints are cracking, water is sitting in the low spots and weeds are establishing in the joints. The repair is to lift and relay, which usually means most of the patio.
Skipping the primer is described by installers as the single most common cause of porcelain paving failure, and nothing I found in the research contradicts that.
How the slabs actually get pushed off the bed
The bond is the first half of the mechanism. The second half is water, and it explains why the failure accelerates over winter rather than drifting slowly.
Spot bedding, the five-dabs-of-mortar method used on indoor tiles, leaves air voids under the slab. Rain gets through the joints and collects in those voids, because porcelain itself will not let it drain downward.
When the temperature drops below freezing, that trapped water turns to ice and expands by about 9%. The slab above it is rigid, the base below it is rigid, so the expansion has only one direction to go.
The result is a hydraulic lift that breaks whatever weak bond existed. When the ice thaws, the slab settles back down loose, and you hear the hollow knock for the first time.
This is also why the same failure shows up in basements and against foundation walls, where trapped moisture behind a rigid surface does similar damage over a freeze cycle. If you are managing water around the house generally, the whole-house sequence for basement moisture is worth reading alongside this.
A patio that drains toward the building creates the exact problem the basement work is trying to solve.
A full mortar bed removes the voids, so there is nowhere for water to collect and nothing for ice to push against. Spot bedding is not an acceptable method for outdoor porcelain under any circumstances, and the standard for paving design, BS 7533, is written on that basis.
What the primer does, and its second job
A slurry primer is a polymer-modified cementitious coating, brushed onto the back of each slab immediately before it goes down. The polymers grip the smooth porcelain and the cement particles bond into the wet mortar bed.
It comes two ways. Pre-blended powder you mix with water is the straightforward option, consistent batch to batch, and the right choice for most patios. SBR, a styrene butadiene rubber liquid you mix with cement yourself, is harder to keep consistent across a day’s work.
SBR is not PVA, and PVA is not a substitute for either.
Mixed primer stays workable for roughly ten to fifteen minutes, so you mix small quantities. The whole back face gets covered, including edges and corners, which matters more the larger the slab.
Each slab goes down while its primer is still wet. Prime one, lay one, prime the next. Any primer that gets on the visible face comes off immediately, not later.
The second function almost nobody mentions is that the primer also blocks salt migration. Efflorescence, the white chalky bloom that appears on new patios, is not caused by the porcelain at all. Moisture carries salts up out of the sub-base and bedding mortar, and leaves them behind as it evaporates.
A polymer-modified bonding bridge across the back of the slab interrupts that route. So the same five-minute step prevents both the bond failure and the white staining that gets blamed on the slabs.
If it does appear, deal with it when the patio is bone dry. Sweep with a stiff brush that is not wire, then use a proper efflorescence remover and work it into the micro-texture where the residue sits.
And do not seal outdoor porcelain. It does not need it, and a sealant over a surface that is still shedding salts traps them underneath as a cloudy haze that is considerably harder to fix than the original problem.

The build, with the numbers
These are the figures a competent installer works to, and they are worth knowing so you can tell whether the quote you are reading is from someone who does.
Excavate 150 to 200mm. Lay 100mm of MOT Type 1 sub-base in two compacted layers, increasing to 150 or 200mm on clay, made ground or anything carrying vehicles.
The mortar bed is 30 to 40mm, full coverage, mixed at 4:1 sharp sand to cement. If the joints are going to be filled with a permeable brush-in compound, the mix goes leaner at 6:1.
Lay only as much bed as can be covered in about twenty minutes, or the surface skins over and the bond suffers even with primer.
Fall is 1:80 as a minimum, which is 12.5mm drop per metre, and nearer 1:60 across large open areas. Anything flatter than 1:100 will hold standing water somewhere.
The finished surface must sit at least 150mm below the damp proof course. That comes from Approved Document C of the Building Regulations, which requires the DPC on an external wall to be 150mm above adjoining ground, and it is the single most commonly broken rule on retrofit patios.
Joints run 3 to 10mm, with 5mm spacers the usual choice. No foot traffic for at least 24 hours, no heavy loads for several days.
Expansion joints, and the failure nobody warns about
Porcelain expands and contracts with temperature. A ten-metre run can move several millimetres across a hot day, and that movement has to be accommodated somewhere.
If the whole field is locked together with rigid cement grout and butted hard against a wall, the only release available is upward. Two slabs lift against each other into a shallow V, which the trade calls tenting, and the patio is finished.
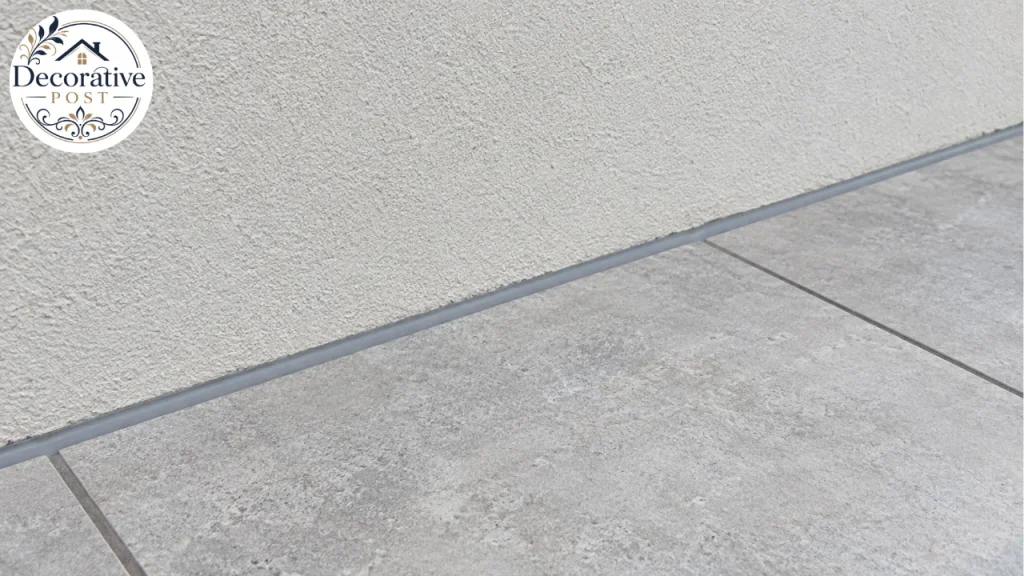
Movement joints every three to five metres and around the full perimeter prevent it. They get filled with a flexible sealant, not grout.
This is the same logic that governs the joint where a kitchen counter meets tile, where a rigid grout line will always crack and a flexible silicone will not. The same principle at a backsplash is easier to see at eye level, and the grout decisions are closely related.
Grout and sealant choices
For the field joints, resin-based brush-in compounds are generally the better outdoor choice. They stay slightly flexible, they are permeable, and they do not crack across the face when the ground moves a little.
Rigid cement grout in an outdoor joint is a crack waiting for its first winter. It can be made to work, but it is less forgiving of a base that settles at all.
For perimeter and movement joints, use a high-modulus, non-staining outdoor silicone. Neutral-cure, not acetoxy.
That distinction is worth understanding because the consequence is permanent. Acetoxy silicones can leach oil into adjacent porous stone and leave a dark halo along the joint that does not come out, so a cheap tube against a limestone wall or a sandstone coping can ruin the stone rather than the joint.
Cutting it is not a weekend job
20mm porcelain is genuinely hard, and ordinary tile tools will not touch it. A manual score-and-snap cutter needs around 1,000kg of breaking force to do it cleanly, which puts you into professional machines.
The alternative is a wet-cut diamond blade on a bench saw or an angle grinder, run wet both to cool the blade and to control silica dust. Dry cutting porcelain is a respiratory hazard, not just a mess.
Factor this into your material order. Cuts fail, patterns waste more than grid layouts, and a herringbone or any diagonal set-out will eat noticeably more than a straight course. Order the waste allowance up front, because a second order will not match the first batch exactly.
Which is the other reason to buy from a merchant who can tell you the batch number and hold stock for you through the build.
Choosing the colour without regretting it
PorcelPave sits where almost all outdoor porcelain sits: a narrow band of greys, beiges and anthracites, with names that are inconsistent across suppliers. Range names are proper nouns, so you will also see both spellings of the word in the same catalogue, which is a separate question about grey and gray that trips up a surprising number of product listings.
Two practical points. Mid-tone slabs hide everything: pollen, dust, dried rain marks, the general grime of an outdoor surface. Very pale and very dark slabs show all of it, and anthracite in particular shows every dried water spot.
Hard water makes that worse, and the mineral spotting on a dark patio behaves much like it does on glass, where hard water deposits can etch permanently if they are left to build up over seasons.
Second, judge the slab outdoors, wet, on the ground. Showroom lighting makes every grey look warmer and every beige look cleaner than it will in overcast daylight.
The same reflectance logic that governs how a colour reads on a ceiling applies outdoors, where a large horizontal plane bounces sky light up at the house.
Designing the space the paving is for
Worth deciding before you order, because it changes the quantity and the set-out. A patio that is only ever walked across can be smaller than you think. One that holds a table needs clearance for pulled-out chairs on every side that gets used.
If the plan includes an outdoor bar or a serving run along one edge, the layout principles for a home bar transfer directly, and the standing-and-circulation space is the part people underestimate.
The same applies to seating. Outdoor furniture takes up more floor than its footprint suggests once people are actually sitting in it, and the way furniture organises a room is a better guide to patio sizing than a square-metre figure.
Built-in benching along a wall or a raised bed is often the better answer on a small patio, because it recovers the circulation space that loose chairs waste. If you are building it yourself, the construction approach for built-ins carries over, with the obvious change of materials for weather exposure.
Leave a planting edge if you possibly can. A hard rectangle of porcelain with nothing growing against it reads as a loading bay, and a 300mm border does a disproportionate amount of work.
Spring bulbs are the easiest version, and tulips in particular time well against a patio finished over winter.
The mistakes that cost the most
No slurry primer. The patio will fail, the only question is which winter.
Spot bedding instead of a full bed. Creates the voids that freeze-thaw exploits, and leaves slabs unsupported under point loads.
Finishing level with or above the damp proof course. Bridges the DPC and pushes water at the wall.
Too little fall, or fall toward the house. Standing water, algae, and a drainage problem you now own.
No movement joints. Tenting, usually in the second or third summer.
Rigid cement grout everywhere including the perimeter. Cracking along every edge.
Acetoxy silicone next to natural stone. Permanent dark staining on the stone.
Sealing outdoor porcelain. Unnecessary at best, a trapped white haze at worst.
Buying on the R number alone. Ask for the wet PTV.
What to ask the merchant
Four questions, and the answers tell you most of what you need.
What is the wet PTV, not just the R rating? Are these rectified? What is the batch number, and can you hold the balance of the order? And what is the thickness tolerance across the pallet?
A supplier who can answer all four is selling a controlled product. One who can only repeat the range name and the R11 figure is selling a sticker.
That is the practical case for treating PorcelPave, or any trade range, as a starting point for a conversation rather than an answer. The slab matters less than the four numbers behind it, and far less than the hour of labour that puts primer on its back.
A note for readers outside the UK
The physics is identical everywhere, but the paperwork is not. R ratings and pendulum values are the European and UK convention, and they do not appear on North American datasheets.
US products are specified instead under ANSI A137.1, which reports a wet dynamic coefficient of friction from the DCOF AcuTest. The commonly cited threshold is 0.42 for level surfaces expected to be walked on wet, and it is a floor rather than a target, so outdoor and sloped applications warrant better.
If you are reading a European datasheet in the US, or an American one in Britain, the figures do not convert. Ask for whichever standard your inspector or installer actually works to.
What this comes down to
PorcelPave is a competent 20mm outdoor porcelain range, which is to say it is much like the rest of the category, because the category is defined by the material rather than by the brands selling it.
The money and attention belong somewhere else. Get a slip figure you can defend, confirm the slabs are rectified if you want tight joints, and then spend whatever it takes on an installer who primes the back of every slab and lays them on a full bed with proper falls and movement joints.
A mid-priced slab installed properly will look right for twenty years. A premium slab on five dabs of mortar will be rocking by the second winter, and no amount of brand name on the pallet will change that.
FAQs:
Is PorcelPave a good brand?
It is a mainstream 20mm outdoor porcelain range, and the material properties are inherent to porcelain rather than to the brand.
Who makes PorcelPave?
It is supplied as a trade range through UK paving merchants and builders’ merchants rather than sold direct to the public. Range names in this market frequently cover slabs from the same overseas factories, so ask your supplier for the manufacturer’s datasheet rather than relying on the range name.
Can I use 20mm porcelain on a driveway?
Not on a normal patio build-up. A driveway needs either 30mm porcelain on an engineered base, or 20mm fully bonded to a reinforced concrete slab that is carrying the vehicle load itself.
Do I really need slurry primer?
Yes. Porcelain absorbs under 0.5% water, so mortar has nothing to key into and no chemical bond forms without it. Installers describe skipping it as the most common cause of porcelain paving failure, and it typically shows up as rocking slabs between six and twelve months.
Why is my new porcelain patio covered in white marks?
Almost certainly efflorescence. Salts from the sub-base and bedding mortar migrate up with moisture and are left behind as it evaporates. It is not coming from the porcelain, it is usually temporary, and it is removed with a dry sweep and an efflorescence remover rather than by sealing over it.
Is R11 slip-resistant enough for a patio?
It is the industry default but it is borderline. R11 can correspond to a wet PTV anywhere from roughly 34 to 51, and the HSE working minimum is 36, so an R11 slab can fail that threshold. Ask for the wet PTV and aim for 40 or above outdoors, particularly on steps and slopes.
Should I seal outdoor porcelain?
No. It is effectively non-porous, so sealing achieves nothing, and sealing while salts are still migrating can trap them under the film as a cloudy haze.
How do you cut 20mm porcelain?
Either a professional manual cutter rated to around 1,000kg of breaking force, or a wet-cut diamond blade. Always wet, both to cool the blade and to suppress silica dust.