

There is a predictable way these projects go wrong. Someone frames walls, insulates, boards, lays flooring, and six months later a dark stain spreads across the drywall at floor level.
Nothing failed. The water was always coming in. It just had nowhere visible to go until there was a wall in front of it.
A basement is the only room in a house with soil pressing against three or four of its sides, and that single fact dictates the entire order of work. Get the sequence right, and the rest is ordinary construction.
What counts as a basement
Worth two minutes, because the type you have changes what is possible.
A basement is any floor of a building wholly or partly below ground level. Below that, there are meaningful distinctions.
Full basement. Entirely below grade, windows small and high if they exist at all. The hardest to make feel like living space, and the most prone to moisture.
Daylight or look-out basement. Built into a slope so part of the wall rises above grade, allowing normal windows. Substantially brighter and easier to finish.
Walk-out basement. The same idea taken further, with a door giving direct access outside at that level. The most valuable version by some margin: walk-out and daylight homes typically appraise higher than standard-basement equivalents because the space counts as genuinely usable.
English basement. A lower ground floor, usually in a terraced or city house, with the floor partly above grade. Common in older urban housing and often a separate flat.
Cellar. Loosely, an unfinished storage space rather than a finished room. The distinction matters in some jurisdictions, where “cellar” and “basement” carry different legal definitions affecting whether the space can be habitable.
Sub-basement. A level below the basement. Expensive to build and uncommon in houses.
If you have a walk-out or daylight basement, you are starting from a far better position than someone with a full one. Plan accordingly rather than assuming the same approach applies.
The order of operations
This is the whole article in one list. Almost every expensive basement failure is a sequencing error rather than a workmanship one.
Every one of the first five becomes dramatically more expensive once step six is done. Opening a finished wall to chase a leak costs ten times what diagnosing it beforehand would have.
Contractors who want to start at step six should be asked why.
Water
Every basement moisture problem is one of three things, and the fix differs completely.
Bulk water. Visible leaking through a crack, at the wall-floor joint, around a window well, or up through the slab. This is a drainage problem, not a sealing problem.
The usual causes are boringly external. Gutters discharging beside the foundation, downspouts ending too close to the house, ground sloping toward the wall rather than away from it. Fixing those solves a surprising proportion of basement water, costs very little, and should always be attempted first.
If water persists, the solutions escalate: exterior waterproofing and drainage, interior perimeter drain to a sump, or a sump pump where one does not exist. These are specialist jobs.
Condensation. Warm humid air meeting cold surfaces. The telltale is dampness that appears in summer rather than after rain, and water on pipes and walls rather than running from a specific point. The fix is dehumidification and insulation, not drainage.
Vapour through the slab. Invisible, continuous, and the one almost nobody checks. Concrete passes water vapour upward from the soil permanently.
Test it before you lay anything: tape a two-foot square of clear plastic to the bare slab, seal all four edges, and leave it for three days. Condensation underneath or a darkened patch of concrete means active vapour transmission.
That result determines your flooring. It is covered properly in our guide to choosing LVP flooring for a basement, because impermeable floating floors trap exactly this kind of moisture against the slab.
Do not finish anything until the basement has stayed dry through a full wet season. One dry month proves nothing.
Radon
Soil gas does not care how good your drainage is.
Radon is colourless, odourless and a recognised leading cause of lung cancer. It accumulates in the lowest level of a house, which is precisely the level you are about to start spending time in.
Test before you finish. A short-term kit costs very little, and the test is far easier on a bare basement than on a finished one.
If the result is at or above 4 pCi/L, a mitigation system is the answer, and installing it before the walls go up is considerably cheaper and tidier than retrofitting around finished space. Our guide to radon mitigation systems covers what they cost and how they work.
If your house already has a radon pipe with no fan, that is a passive rough-in rather than a guarantee. Test anyway.
This is the step most commonly skipped, and the one that is hardest to reverse. Doing it at the right moment costs hundreds rather than thousands.
Air
A basement is cool and often humid, which is the exact combination mould wants.
Target relative humidity between 30 and 50 percent. A dehumidifier with a condensate drain, rather than a bucket, is the practical answer in most climates; nobody empties a bucket reliably for ten years.
Ventilation matters too. A basement that is sealed, unheated, and unventilated will develop a smell, and then a problem, and the smell is the early warning.
If you intend to heat the space, check whether your existing system can actually serve it. Adding a room to a heating system that was sized without it is a common oversight, and it shows up as a cold room nobody uses. The same comfort principles in our notes on managing a room with AC apply in reverse down here.
Deal with any existing mould before building over it. Surface growth on masonry cleans off, and the approach is the same as elsewhere in the house; our mould guide covers which products work on porous surfaces and, importantly, which combinations are dangerous to mix in an enclosed space.
The slab and insulation
Two decisions that are effectively permanent once made.
The slab. Check that it is level before you plan flooring. Dips over about 3mm across a six-foot span need self-levelling compound, because click-together floors fail over hollows.
Crack repair is usually straightforward. Structural cracks that are wide, growing, or with displacement between the two sides are not, and warrant a structural engineer rather than a filler.
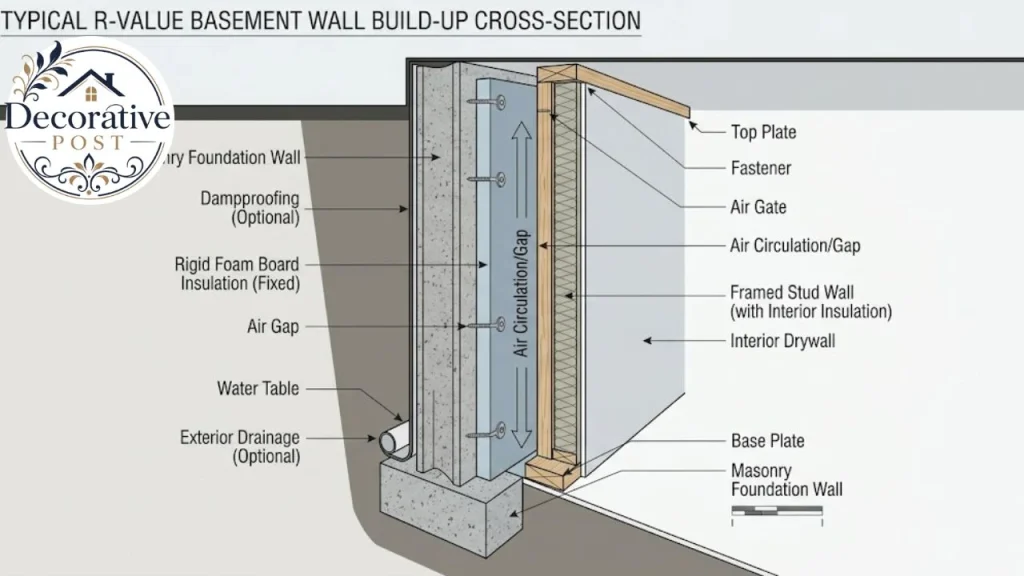
Insulation. Basement walls lose a great deal of heat, and uninsulated masonry stays cold enough to condense moisture out of the air permanently.
Rigid foam board fixed directly to the masonry is the standard approach, with framing in front of it rather than against the wall. The foam keeps the masonry surface above dew point, which is the actual mechanism preventing condensation inside the wall build-up.
What to avoid: fibreglass batts directly against masonry. They absorb moisture, lose their insulating value, and hold water against the wall. This was standard practice for decades and is now understood to be a significant cause of hidden basement mould.
Insulate the rim joist too. It is a substantial heat loss point and easy to reach while the ceiling is open.
Egress and ceiling height
The two rules most likely to stop a project, and both are worth checking before any money is spent.
Egress. Any basement bedroom requires an emergency escape opening, typically a window,w with a minimum clear opening of around 5.7 square feet, at least 24 inches high and 20 inches wide, with the sill no more than 44 inches above the floor. A walk-out door satisfies this.
If your basement has only small high windows and you want a bedroom, you are looking at cutting a new window well into the foundation. That is a serious job with real cost, and it needs to be in the budget from day one rather than discovered later.
Ceiling height. Habitable rooms generally require a minimum finished ceiling height of around seven feet, with limited allowances for beams and ducts.
Measure from the finished floor to the lowest obstruction, not to the joists. Ductwork,p pipes, and beams are what actually set the number, and a subfloor system adds an inch you may not be able to spare.
These are typical requirements under widely adopted residential codes. Local amendments vary, so confirm with your building department before designing anything and pull permits. Unpermitted finished space can complicate a sale considerably.
The questions to ask a contractor
Three questions separate a contractor who understands basements from one who builds rooms.
“How will you handle vapour from the slab?” A good answer involves testing and a specific plan. A shrug, or an assurance that the flooring is waterproof, means they are thinking about the plank rather than the assembly.
“What goes against the masonry?” The answer should be rigid foam. If it is fibreglass batts, they are working from a decades-old playbook that is now understood to cause hidden mould.
“Are we pulling permits?” Anyone suggesting the work is small enough to skip them is creating a disclosure problem you will inherit at resale.
Ask for the moisture and radon results to be documented before and after. A contractor who welcomes that is confident in their work.
Get three quotes and compare what is actually included. Preparation work is where quotes diverge most, and the cheapest one is often the one that assumed the slab was fine.
Finishing it
Only now does the fun part start.
Framing. Leave a gap between framing and the masonry wall, with the rigid foam behind. Use pressure-treated timber for any plate sitting on concrete.
Ceilings. A suspended grid keeps access to pipes and wiring, which matters more in a basement than anywhere else in the house. Drywall looks better and makes future access destructive. Painting exposed joists black is a third option that suits industrial-leaning rooms and costs almost nothing; our ceiling colour guide covers when that works and when it looks unfinished.
Flooring. Rigid-core vinyl plank is the default for good reason. Avoid solid wood and anything with an organic backing.
Lighting. This is where basements are won or lost. One ceiling fixture in the middle of a room makes a space feel like a cellar no matter what else you do. Layer it: recessed lighting on the perimeter, lamps at seating height, and something at eye level. Warm bulbs, not cool ones.
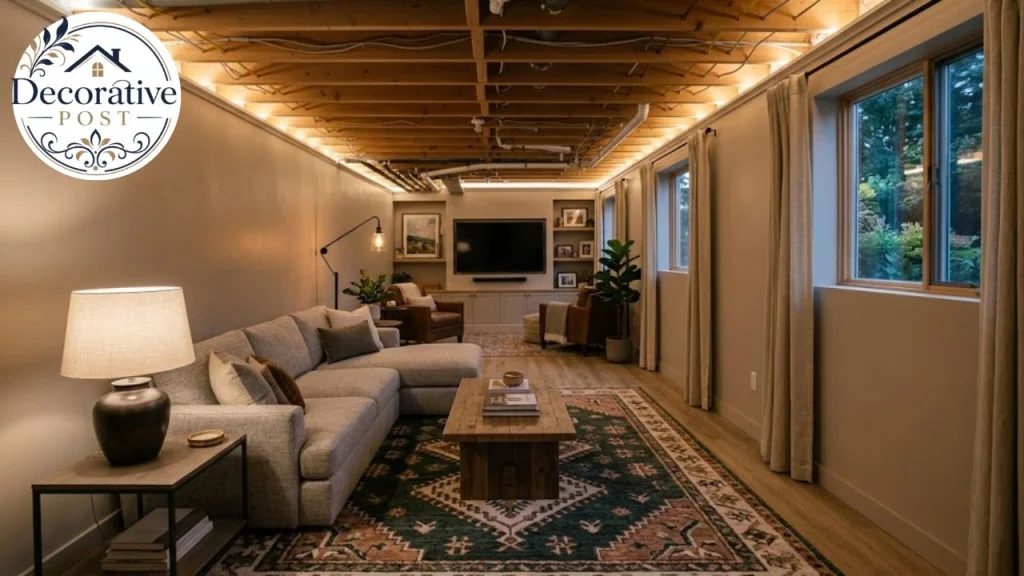
Stairs. Often the worst part of the space and rarely budgeted for. Decent handrails, adequate lighting, and a finished floor covering transform the experience of going down there, which affects whether the room gets used at all.
What to actually put in it
The spaces that get used share one characteristic: they have a defined purpose rather than being general overflow.
Family or media room. The most common and the best fit. Basements are naturally dark and sound-isolated, which is an advantage here rather than a problem.
Home bar or games room. Suits the space genuinely well, and the plumbing is usually accessible. If you are planning one, our home bar ideas cover layouts that work in a lower-ceilinged room.
Guest suite or rental. The highest value use, and the one with the most regulatory weight. Egress, ceiling height, heating, and often a separate entrance all come into play.
Home office. Works well if you solve the light problem. A daylight basement is ideal; a full basement needs serious artificial lighting.
Gym. Concrete floors handle load, ceiling height permitting. Check equipment heights against your actual clearance before buying anything.
Laundry and utility. Usually already down there. Worth doing properly rather than leaving as an afterthought; our guide to laundry room cabinets covers making a functional corner out of it.
Storage. The honest answer for part of any basement. Build it in deliberately rather than letting it sprawl, and built-in shelving along one wall keeps it contained.
The common mistake is trying to make one room do four things. A basement that is simultaneously a gym, an office, a guest room, and storage ends up being storage.
Making it feel like a room rather than a basement
Four things do most of the work, and none is expensive.
Light colours on walls and ceiling. Reflected light is most of what you have down there.
Rugs over hard flooring. Breaks the thermal bridge, absorbs echo, and softens a space that is otherwise all hard surfaces.
Furniture away from walls. Pushing everything to the perimeter in an already low room emphasises exactly the proportions you want to disguise. The same arrangement principles behind a cozy living room apply here, more so.
Deal with the smell. Basements that smell of basement are telling you something about humidity. Fix the cause, not the symptom;m air fresheners over a damp problem are a bad trade.
What it costs
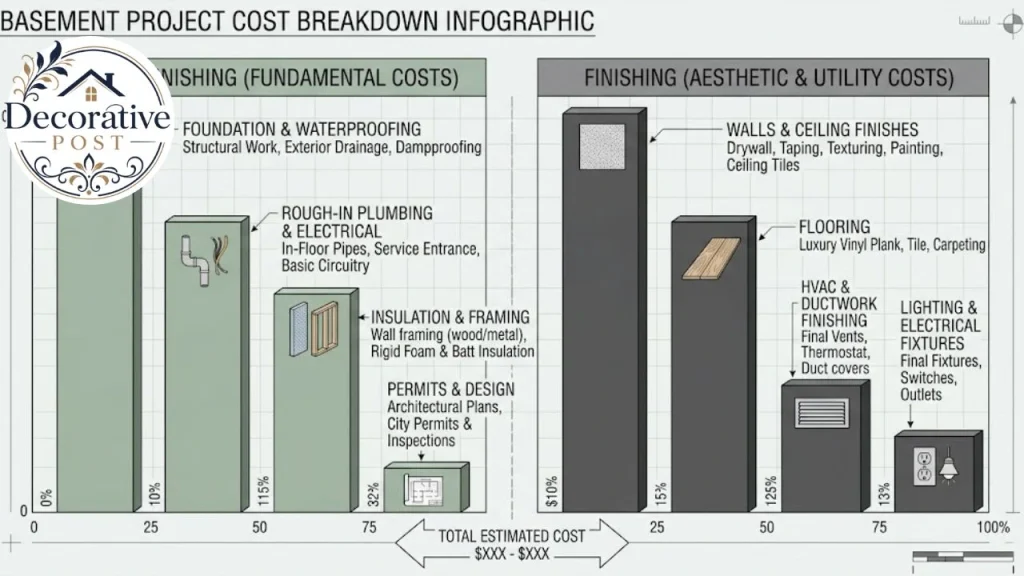
Ranges vary enormously by region and scope, but these are useful planning figures.
Basement finishing is commonly cited as returning around seventy percent of its resale cost, which places it mid-pack among major renovations, better than a high-end kitchen, worse than a new front door.
But that figure assumes the work is permitted, dry,y and properly finished. An unpermitted basement with a damp problem returns considerably less, and can actively complicate a sale.
Budget the first five steps separately from the finishing budget. People routinely allocate everything to visible work and then discover the drainage quote.
When finishing is the wrong answer.
Worth stating, because the renovation industry rarely does.
If water is still entering, no amount of finishing fixes it. You are building a cavity for mould.
If ceiling height cannot reach code, a finished room that cannot legally be called habitable does little for value and may complicate disclosure.
If the only use is storage, a sealed slab, good lighting, open shelving, and a dehumidifier give you ninety percent of the benefit for five percent of the cost.
If the house is a bi-level or split-level, the lower floor is often already partly finished and partly above grade, which changes the calculation entirely, frequently for the better.
If budget is tight, a partially finished basement done properly beats a fully finished one done cheaply. Paint the masonry, seal the slab, light it well, and finish one section.
A realistic sequence
If you are starting from an unfinished space, this is the timeline that works.
Months one to twelve: observe. Live with it through a full year of weather. Note where water appears, when humidity rises, and how cold it gets. This information cannot be bought, and it determines everything else.
During that time: test for radon, run the plastic-sheet slab test, fix gutters and grading, and get a dehumidifier running.
Then: specialist work. Drainage, radon mitigation, electrical upgrades, any structural repair. Permits where required.
Then: insulation and framing, with the rigid foam against the masonry.
Then: finishing. Flooring, ceiling, lighting, paint.
Finally: retest radon, because finishing changes a house’s pressure relationships and can alter levels.
Patience here is not caution for its own sake. A year of observation costs nothing and prevents the single most common and expensive basement mistake, which is finishing over a problem that was always going to surface.
The space is worth having. Done in the right order, a basement is the cheapest square footage you will ever add to a house you already own, and it needs no foundation, no roof, and no planning permission to exist. It just needs to be dry first.
FAQs:
Do I need to test for radon before finishing a basement?
Yes. Radon accumulates in the lowest level of a house, and testing and mitigating before walls go up is far cheaper than retrofitting afterwards. The EPA recommends action at or above 4 pCi/L.
What is the minimum ceiling height for a finished basement?
Habitable rooms typically require around seven feet of finished ceiling height under widely adopted residential codes, measured to the lowest obstruction such as ducts or beams. Confirm with your local building department.
Does a basement bedroom need an egress window?
Yes. Basement bedrooms require an emergency escape opening with a minimum 5.7 square foot clear opening, commonly at least 24 inches high and 20 inches wide, with the sill no more than 44 inches above the floor. A walk-out door also satisfies this.
What insulation should I use on basement walls?
Rigid foam board fixed directly to the masonry, with framing in front of it. Avoid fibreglass batts against masonry; they absorb moisture, lose effectiveness, and contribute to hidden mould.
How much does it cost to finish a basement?
Roughly $30 to $50 per square foot for a basic finish, and $60 to $100 or more for a high specification. Moisture, radon, and egress work are separate costs that should be budgeted before any finishing.
Does finishing a basement add value?
It is commonly cited as returning around seventy percent of its cost at resale, placing it mid-pack among major renovations. That depends on the work being permitted, dry,y and properly finished; unpermitted or damp space returns far less.
What is a walk-out basement?
A basement built into a slope so that one side is at or near grade, with a door giving direct access outside. Walk-out and daylight basements typically appraise higher than full basements because the space is genuinely usable living area.