

Prices and times are taken from the tutorials named in the text and will vary with your tools and local stores. Check the weight rating on any hanging hardware before you rely on it.
The short answer
Anchor projects are DIY decor crafts built around the anchor shape, usually for coastal, nautical, or beach-house rooms. The most popular are a jigsaw-cut plywood anchor, a rope-wrapped anchor on a painted board,d and a sand-textured anchor in a small frame.
Most cost very little. One rope-art tutorial puts its total at about $10 to $15, and another monogrammed-anchor craft estimates $11 to $20 and an evening of work.
The part people skip is the hanging. A painted plywood anchor is light, but a large or heavy piece needs the right wall hardware, and this guide covers that too.
A note on the phrase
“Anchor projects” can mean a few things. In construction, it can mean work that secures something to a wall, and in embroidery it can mean projects using Anchor brand thread.
This guide covers decor crafts that use the anchor as a motif, plus the wall-anchoring knowledge you need to hang them. If you wanted a different meaning, the hanging section is still useful for any wall decor.
Why the anchor motif keeps working
The anchor is one of the simplest recognisable shapes in decor. A ring at the top, a shaft, a crossbar and two curved arms are easy to trace, cut, stitch or glue.
It also carries meaning. Anchors suggest stability and home, which is why they suit beach houses, nurseries, bathrooms and entryways.
Because the shape is simple, the material does the work. The same outline looks relaxed in white-painted plywood, rugged in rope, and delicate in sand on teal.
That makes it a friendly first project. You can get a good result with basic tools, and mistakes show less on a distressed or handmade piece.
Tools and materials worth having
Most anchor projects share a short kit, so a single shopping trip covers several of them.
A printer and paper let you enlarge a template. One tutorial enlarged its template with photo editing software and printed it as a large engineering print, which is a good option if you want a big piece.
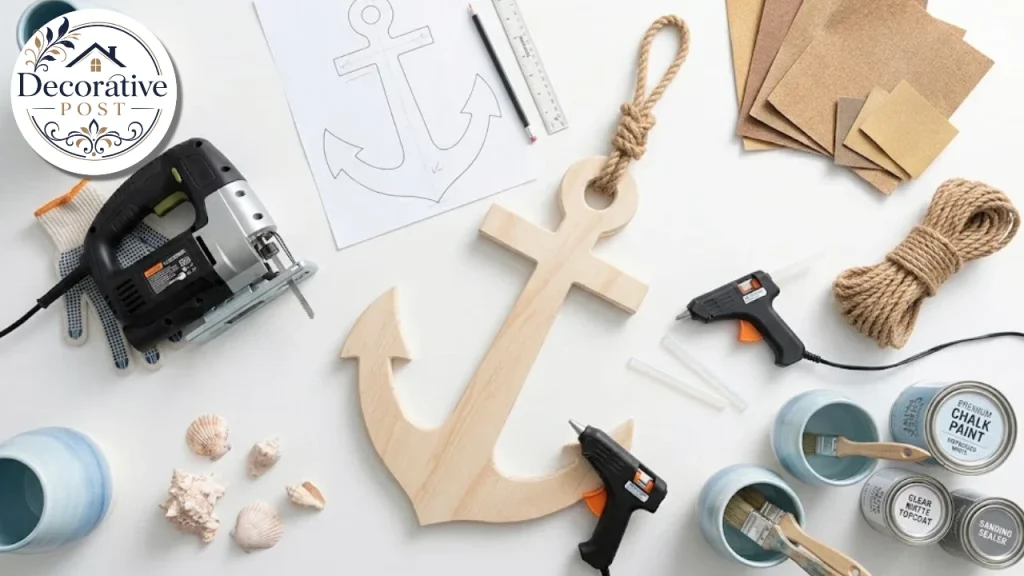
A jigsaw, pencil, sandpaper, and safety glasses cover the wood projects. For rope and twine, you need a hot glue gun and sharp scissors.
Spray paint gives the smoothest finish on larger flat areas. Craft paint suits small details and frames.
A sawtooth hanger or picture hanging strips handle the mounting for light pieces. Heavier work needs proper wall anchors, covered later.
Add a drop cloth and a mask for sanding and painting. Wood dust and rope fibres get everywhere.
Costs and time at a glance
Seeing the projects side by side helps you choose. The figures are the tutorials’ own, and anything marked as an estimate is mine.
| Project | Cost and time (from the tutorial) | Skill level |
|---|---|---|
| Painted plywood anchor | Not stated; plywood, paint and a hanger | Moderate (jigsaw) |
| Rope anchor on board | About $10 to $15; a couple of hours | Easy |
| Sand anchor in frame | Not stated; a craft-store frame and sticks | Easy |
| Monogrammed anchor hook | $11 to $20; about an evening | Easy |
| Six-project nautical set | Listed as simple; about 6 hours in total | Easy |
If you are new to crafting, start with the rope anchor or the sand frame. Both avoid power tools, and both forgive small mistakes. These anchor projects also teach the skills you need for the plywood version.
Project 1: the painted plywood anchor
This is the classic, and it works at almost any size. A tutorial from a home-decor blogger makes an anchor about 30 inches tall, and her FAQ says 24 to 36 inches works well for most spaces.
Materials: plywood, white paint (spray recommended), sandpaper, a sawtooth hanger and an anchor template.
Tools: a jigsaw, a pencil, and safety glasses.
Enlarge the template to the height you want, print it, cut it out and tape it to the plywood. Trace the outline slowly, especially around the curves.
Cut with the jigsaw and let the saw do the work. Clamp the plywood to keep it steady, and use a sharp blade to reduce splintering. If you are nervous, practise on scrap first.
Sand the edges until smooth, then paint in several light coats rather than one heavy coat, which helps avoid drips.
Once the paint is fully dry, lightly sand the corners, curves and raised areas to distress it. Slightly uneven handmade edges suit the look, so do not chase perfection.
Colour options from the tutorial include white, soft blue, driftwood grey, cream, matte black, seafoam green and weathered navy. For a deeper look at grey tones in paint, the grey versus gray guide explains how shades read in different light.
For outdoor use, choose exterior-grade plywood or cedar and seal it with exterior paint or polyurethane.
Project 2: the rope anchor on a painted board
This project replaces cutting with gluing, so it suits people without a saw. A tutorial from a decor blog builds it on a 24 by 24 inch board.
Materials: a pre-cut 24 by 24 inch wood board, several 1 by 24 inch strips for a frame, twine, navy spray paint, aged copper spray paint, white chalk paint, hot glue, chalk and a printed anchor guide.
Spray the board navy and the frame pieces your chosen colour, and let them dry. Print an anchor as large as your printer allows, and scale it to your board. The author doubled the guide’s measurements to fit.
Trace the anchor onto the board with chalk. Pencil did not show on the dark paint, and the outline does not need to be exact because the rope will cover it.
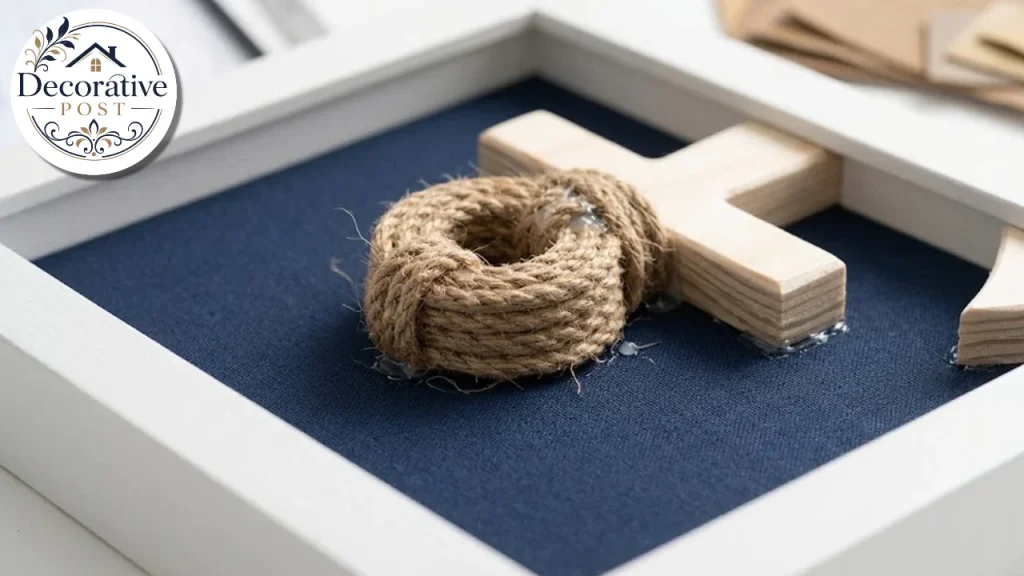
Glue the rope one piece at a time along the outline. Each ring of the anchor is a separate length. Stagger the ends so the seams are less visible.
Fill small gaps with hot glue and an unraveled piece of twine. Twine usually has three strands, and you can separate it into double or single strands for fine detail.
For the frame, paint the strips white and glue the horizontal pieces first. When those set, add the vertical pieces on top. The author made no cuts and used pieces straight from the store.
The tutorial reports a couple of hours of work and about $10 to $15 in total cost. It also warns that rope debris is messy, so plan for cleanup.
Mount it with picture hanging strips if the board is light.
Project 3: the sand anchor in a small frame
This is a good small project, and a good one to do with kids. A craft blogger builds it in a 5-by-7-inch frame.
Materials: a bobbin-edge picture frame, five jumbo craft sticks, teal craft paint, an anchor template on cardstock, school glue, and craft sand.
Remove the frame backer and discard the glass. Trim the craft sticks to match the height of the backer, cutting off the rounded ends first.
Hot glue the sticks side by side onto the backer to make a faux shiplap background. Paint them teal and let them dry completely.
Cut an anchor from cardstock and spread an even layer of school glue over it, working on parchment paper. Sprinkle craft sand over the glue and let it dry. The author suggests an hour or two.
Put the painted background back in the frame. Shake off the loose sand and hot glue the anchor to the centre.
It yields one frame and takes little time, which makes it ideal for a set of three on a shelf.
Project 4: the monogrammed anchor hook
A craft designer turns a wooden anchor-shaped hook into a personalised robe or towel holder. She estimates $11 to $20 and about an evening.
The key material is an unfinished wooden anchor hook, which she buys from an online supplier. If you cannot find that exact one, a similarly shaped hook works, and you can add a monogram yourself with paint and a font you like.
Paint the hook, let it dry,y and add the letter. Use a stencil or print the letter, trace it lightly,ly and fill it in with a small brush.
It makes a thoughtful gift. It also needs a secure mount because it carries wet towels, which weigh more than they look.
Hang a hook like this into a stud or use a proper wall anchor, and avoid a bare plastic plug in plaster or thin drywall.
Project 5: the anchor flag
A craft site lists a fabric anchor flag among six nautical decor projects. It uses muslin, a wooden dowel, red twine,ine and black paint.
Cut a flag from muslin and point the bottom edge. Fold and glue the top into a pocket for the dowel.
Slide the flag onto the dowel and tie red twine at each end to hang it. Paint a black anchor in the centre, and let it dry before you hang it.
This is a light piece, and it suits a wall, a mantel or a child’s room. It is also easy to change, so you can swap the anchor for initials.
Project 6: the flag garland
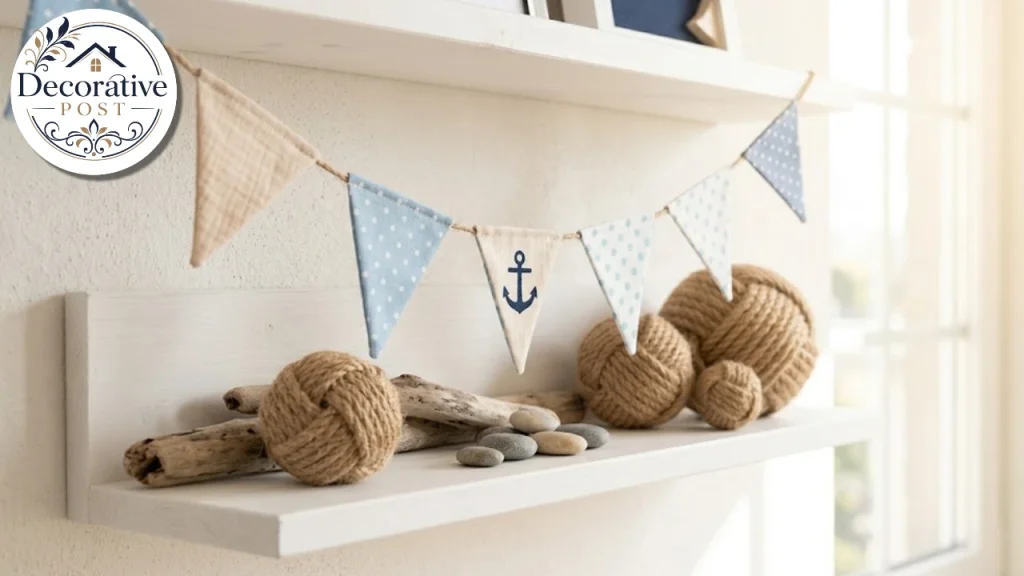
The same site makes a garland from clothesline rope and small fabric flags. The tutorial uses seven flags: four muslin, two red polka-dot, and one grey anchor print.
Cut the rope to length and cut the flags. Fold and glue the top of each flag to form a pocket, keeping every flag the same length.
Thread the flags onto the rope in your chosen pattern and knot both ends. Hang it across a shelf, a window or a doorway.
You can adapt the pattern to a party. Use one anchor flag at the centre and let plain flags frame it.
Projects 7 to 9: small accents
The same craft collection includes smaller pieces that pair well with an anchor wall piece.
Decorated driftwood is painted with stripes and wrapped with twine. Paint stripes in aqua and red, let them dry, and wrap indigo and white twine around the wood.
Rope balls are made by gluing clothesline rope in a spiral around a foam ball. Glue one end to the top, wrap and glue as you go, then cut and glue the end at the bottom. A bowl of them makes a quick centrepiece.
Clay starfish are shaped from air-dry clay. Form five clay snakes, join them into a star, smooth the joins, and poke small holes with a toothpick. Paint after it dries.
These small pieces help a room look collected rather than themed by a single motif. Group them in odd numbers on a tray or a shelf.
Projects 10 to 12: ways to vary any anchor
The three ideas below are adaptations, not tutorials, so test them on scrap before you commit.
Change the material. A plywood anchor can be stained instead of painted, or cut from a piece of reclaimed wood for a rustic look.
Change the size. A tall anchor suits an entry wall, while a small one fits a bathroom shelf. Keep proportions the same when you scale a template.
Change the finish. Distressing, a limewash look,k or a glossy navy each give a different mood. Sealing the surface protects it in a bathroom or kitchen.
Try a cluster. Two or three anchors in different sizes and one colour family look intentional, and they cover a larger wall than a single piece.
Working with kids
Several of these crafts suit children, with some adult help. The sand anchor, the rope balls and the flag garland are the friendliest.
Keep the hot glue gun with an adult. Hot glue burns, and a low-temperature gun is a safer option for young helpers.
Let kids handle the painting, sprinkling and arranging. Those steps are forgiving and fun, and they give a real sense of ownership.
Protect surfaces with parchment paper or newspaper, and keep craft sand in a tray so it can be tipped back into the container.
Choose washable paint for little hands, and label finished pieces with the maker’s name and date on the back. Those anchor projects become keepsakes.
Planning a weekend of anchor projects
You can complete a small collection in a weekend if you plan the order.
On the first day, do the messy steps. Cut and paint the plywood anchor, spray the board for the rope piece, and paint the frame sticks. Everything then dries overnight.
On the second day, do the assembly. Glue the rope, apply the sand, hang the garland, and attach hardware.
Batch the same jobs together. Paint everything at once, glue everything at once, and clean up once at the end.
Test each piece on the wall before you fix it. Tape a paper template where the anchor will go, step back and check the height.
Take a photo of the wall first. It helps you plan the cluster and shows where studs and outlets sit.
Choosing colours that feel coastal
Colour does as much as shape. A white anchor on a navy wall is the classic pairing, and it works because the contrast is high and the palette is limited.
Softer schemes also work. Seafoam, pale blue and sand look relaxed, and driftwood grey suits a quieter, more modern coastal room.
Match the finish to the room. A glossy finish suits a bathroom, and a matte or chalky one looks right in a bedroom or living space.
Keep the palette to two or three colours. Too many bright tones turn a nautical theme into a costume.
Tie the piece to the room with one repeated colour in a cushion, a vase or a rug. If you are planning the whole room, the cozy living room guide covers how to build layers around a focal wall.
Where anchor projects work best
The right spot makes simple anchor projects look designed.
Entryways welcome guests and suit a large plywood anchor above a bench or console. A coastal-style sunroom is another natural home, and the Florida room guide covers how those rooms are built and styled.
Bathrooms suit smaller pieces, such as the anchor hook or a framed sand anchor. Use sealed finishes where steam and splashes reach, and the small bathroom vanity guide helps you plan the space around them.
Kitchens work with a framed piece or a rope accent near a coffee station. The kitchen backsplash guide shows colours and finishes that pair with a coastal palette.
Children’s rooms love the flag garland and the anchor flag. Keep any piece out of reach of cribs and avoid small glued parts that could come loose.
Built-in shelves are a good place to group small projects. The DIY built-ins guide explains how to build a niche that shows off a collection.
A bar or game area can carry the theme too. The home bar ideas guide shows layouts where a wall piece becomes the backdrop.
How to hang anchor projects safely
A light plywood anchor needs very little. A tutorial says standard wall hooks usually work because plywood is lightweight, and a sawtooth hanger on the back is enough.
For small, light pieces, adhesive picture hanging strips are an alternative to anchors. The rope-art tutorial mounted its board this way. Follow the weight limit on the strip packaging.
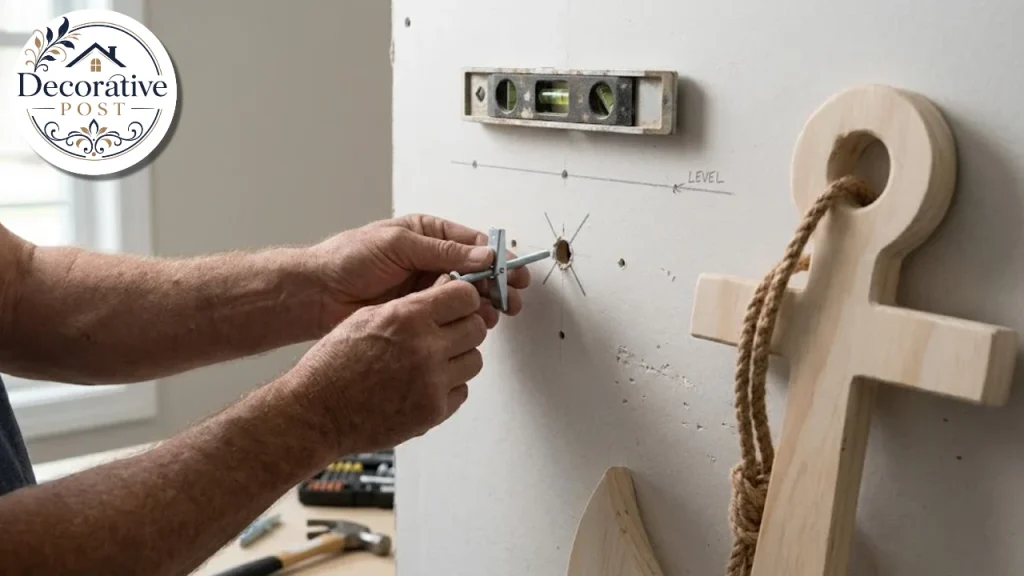
Heavier pieces need real hardware. A basic rule from a home-services guide is to screw or nail directly into a wooden stud when you can, and to use a wall anchor where there is no stud.
Match the anchor to the weight. The same guide says to check the rating on the packaging and divide the object’s weight by the number of anchors to estimate the load on each.
Its table gives these ranges, which vary by brand and wall:
| Anchor type | Typical capacity | Typical use |
|---|---|---|
| Plastic expansion anchor | 5 to 20 lb | Small frames, light art |
| Self-drilling anchor | 5 to 20 lb | Small frames, small mirrors |
| Plastic winged anchor | 5 to 75 lb | Towel rods, coat hooks, mirrors |
| Molly bolt | 25 to 75 lb | Heavy mirrors, small shelves |
| Toggle bolt | 30 to 100+ lb | Cabinets, bookshelves |
A woodworking magazine gives similar guidance with brand-specific ratings. It rates a self-drilling toggle at about 100 pounds in drywall, a molly bolt at about 100 pounds,s and a snap-toggle at about 240 pounds, but it notes that ratings vary by manufacturer and installation.
It also suggests building a hanging method such as a French cleat into heavier pieces, so they are easier to install and remove.
Do not overtighten. The home-services guide warns that overtightening self-drilling and threaded anchors can crumble the drywall and weaken the hold.
Pilot holes matter. Most anchors need a drilled hole, and self-drilling ones do not.
For masonry or brick, use masonry screws or wedge anchors, which need a hammer drill. The woodworking magazine lists them as the options for concrete and brick.
For a large anchor over a bed or a couch, use two fixing points and keep the piece at a sensible height.
Finishing and sealing
A little protection extends the life of anything you make.
For wood, finish with a clear sealer that suits the paint you used. Exterior paint or polyurethane protects an outdoor piece, as the plywood tutorial notes.
For rope and twine, a light spray of matte sealer reduces fraying and dust. Test on a scrap first because some sealers darken rope.
For sand and glue, let the glue cure fully before you handle the frame. Sand can shed for a while, so shake the piece over a sheet of paper.
For fabric, use fabric-safe paint and heat set it if the paint instructions say so.
Dust gently. A soft brush or a low-suction vacuum removes dust without damaging rope or paint.
Common mistakes
Choosing a template that is too small for the wall is the most common. A tiny anchor looks lost, so measure the space first.
Using one heavy coat of paint causes drips, so apply several light coats.
Skipping the sanding after a cut leaves splinters and a rough finish.
Hanging heavy pieces with a bare nail or a weak plastic plug leads to falls and wall damage.
Using too many nautical motifs at once turns a room into a theme park. Pick one star piece and let the rest support it.
Leaving rope pieces unsecured at the ends allows them to unravel, so glue and stagger them.
Ignoring the room’s humidity matters in bathrooms, where unsealed wood and rope absorb moisture.
What to take from it
Good anchor projects do not need a big budget or advanced skills. A jigsaw, a few cans of paint,nt or a hot glue gun are enough to make something that looks designed.
Start with one project that fits your skills. A painted plywood anchor is a strong first choice, and a framed sand anchor is perfect if you want something small.
Then plan the hanging before you finish, so the piece is secure and the wall stays unharmed. The best anchor projects are the ones that stay on the wall.
Pick a colour palette, choose a spot,pot and let the anchor projects you make set the mood for the room. A handmade piece also gives a room character that store-bought decor rarely matches.
FAQs:
What are anchor projects?
DIY decor crafts that use the anchor shape, such as plywood wall anchors, rope art, sand frames, flags, and hooks. They suit coastal and nautical rooms.
How big should a DIY wall anchor be?
One tutorial made a 30-inch anchor and says 24 to 36 inches works well for most spaces. Scale up for large walls and down for shelves.
What is the easiest anchor project for beginners?
A painted plywood anchor is simple if you have a jigsaw. Without a saw, the rope anchor on a painted board needs only paint, glue, and twine.
How much do anchor projects cost?
One rope-art tutorial reports about $10 to $15, and a monogrammed anchor hook craft estimates $11 to $20. Your cost depends on materials you already own.
What paint should I use?
Spray paint gives a smooth finish on plywood. Apply several light coats, and use exterior paint or polyurethane for outdoor pieces.
How do I hang a heavy wooden anchor on drywall?
Screw into a stud when you can. Otherwise,e use a toggle bolt, molly bolt, or snap-toggle with a rating above the piece’s weight, and check the package.
Can I use picture hanging strips for an anchor project?
Yes, for light pieces. Check the weight limit on the strip packaging, and press firmly before you hang the piece.
What colours suit a coastal anchor?
White, navy, soft blue, seafoam, cream and driftwood grey are common. Keep to two or three colours.
Can I make an anchor from rope?
Yes. Trace the outline on a painted board and glue rope along it in separate lengths, staggering the ends so the seams are less visible.