

Mould in a shower is not a sign that you do not clean. It is a sign that warm, wet air sat still in a small room for long enough, repeatedly, and found a surface it liked.
That distinction matters, because it changes the job. Scrubbing removes what is there. It does nothing about the conditions that put it there.
Most people searching for how to clean shower mold have cleaned it before. The method below is the part that works, and the section on recurrence is the part that stops you doing it again in three weeks.
The short answer
How to clean shower mold: saturate the affected area with undiluted white vinegar or 3% hydrogen peroxide, leave it to sit for 30 to 60 minutes, scrub with a stiff nylon brush, rinse, and dry the surface completely.
The dwell time is the part that does the work. Spraying and wiping immediately is why most attempts fail.
Before anything else: do not mix cleaners
This needs saying plainly, because at least one widely read guide on this topic recommends bleach, ammonia, vinegar, and borax without warning you not to combine them.
Never mix bleach with ammonia. It produces chloramine gas. Many glass and multi-surface cleaners contain ammonia, so this happens accidentally more often than people realize.
Never mix bleach with vinegar or any acidic cleaner, including descalers and some toilet bowl products. It releases chlorine gas.
Both cause serious respiratory injury, and a shower cubicle is a small, enclosed, poorly ventilated space. This is the worst possible room in the house to get this wrong.
Pick one product. Rinse thoroughly before switching to another. Open a window or run the fan throughout.
Gloves and eye protection are sensible with any of these. A mask is worth it if you are disturbing a large area.
Work out what you are actually looking at
Before working out how to clean shower mold, work out which of three things you have, because they are not the same.
Mildew is flat, powdery, and grey or white. It sits on the surface and comes off relatively easily. Most bathroom “mould” is this.
Mould proper is fuzzy or slimy, usually black, dark green, or brown, and raised from the surface. It has structures that penetrate porous materials, which is why it resists surface cleaning.
Pink or orange film is not molded at all. It is Serratia marcescens, a bacterium that feeds on soap residue and fat deposits. It wipes away easily but returns fast if the soap scum it eats is not removed, which means the real fix is cleaning rather than disinfecting.
Black mold triggers the most worry. Most of what people call black mold in a shower is a common surface species rather than one that needs sustained saturation of porous material to establish. If you have black growth spreading on drywall or a ceiling rather than on tile, that is a different and more serious conversation.
Why bleach is the wrong default
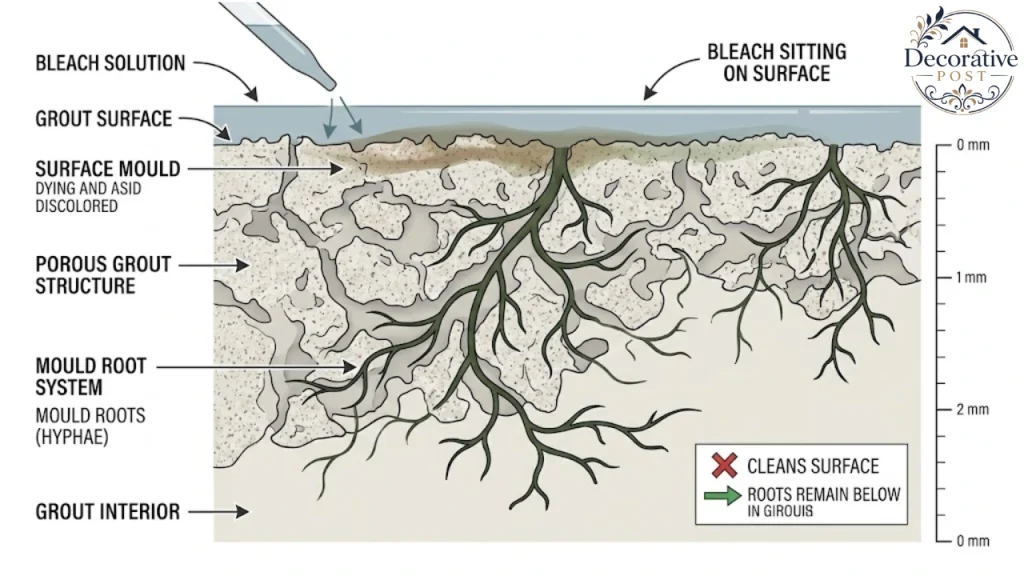
This is the thing most of the internet gets backwards, and it explains why your shower mold keeps returning.
The EPA’s published guidance states that using a biocide such as chlorine bleach is not recommended as a routine practice during mould cleanup. The CDC’s position is that scrubbing with soap and water handles routine cleanup.
The reason is mechanical. Bleach is formulated to sanitize hard, non-porous surfaces. On tile, glass, and acrylic, it works well.
Grout and silicone caulk are porous. On those, the chlorine evaporates quickly while the water component soaks in, and water is what the mould wanted in the first place.
So the visible growth is bleached white and appears to be gone. The roots below are undisturbed, now sitting in added moisture, and they regrow within weeks, looking worse than before.
That cycle is the single most common reason people search how to clean shower mold more than once.
Bleach still has a role. On glazed tile, glass screens, acrylic trays and sealed surfaces where the growth genuinely sits on top, a dilution of roughly one cup per gallon of water is effective and fast. Use it there, used alone, and nowhere else.
What actually works, and at what strength
| Product | Best on | Strength | Dwell time |
|---|---|---|---|
| White vinegar | Grout, caulk, tile, screens the general-purpose choice | Undiluted | 30–60 minutes |
| Hydrogen peroxide | Grout stains, moderate mould, where you want no smell | 3% (standard pharmacy strength) | 10–30 minutes |
| Oxygen bleach (sodium percarbonate) | Grout, stubborn staining, colour-safe | Per pack, as a paste | 15–30 minutes |
| Borax solution | Grout, mild persistent growth | 1 cup per gallon warm water | Leave on, no rinse |
| Chlorine bleach | Glass, glazed tile, acrylic trays only | 1 cup per gallon | 10–15 minutes |
| Baking soda | Mechanical scrubbing aid, not a biocide | Paste | n/a |
One correction worth making: the popular vinegar-and-baking-soda combination largely neutralizes itself. The fizzing looks productive, but you end up with salty water. Use them in sequence vinegar to kill, then baking soda as an abrasive, not mixed in a bowl.
Vinegar penetrates porous surfaces in a way bleach does not, which is why it is the better default for grout.
The method, step by step
Ventilate. Window open, extractor on, door open. Keep it that way throughout and for an hour afterwards.
Protect yourself. Gloves and eye protection. A mask if the area is more than a patch.
Clear the shower. Bottles, soap, razors, the lot. Mould grows happily under a shampoo bottle that never moves, and you need access to the surfaces anyway.
Remove the soap scum first. This is skipped constantly. Mould and bacteria feed on soap residue and body oils, and a layer of scum also blocks your cleaner from reaching the growth beneath. Wash down with warm water and a general bathroom cleaner, then rinse.
Apply and wait. Saturate the mouldy areas properly, dripping, not misting. Then leave it. Thirty minutes minimum for vinegar, an hour is better.
For vertical surfaces where spray runs off, lay strips of paper towel over the area and soak those. It keeps the cleaner in contact, which is the entire point.
Scrub. A stiff nylon brush for general areas and a grout brush or old toothbrush for the lines. Work in small sections and in one direction rather than scrubbing back and forth, which spreads spores across clean surfaces.
Rinse thoroughly, then dry completely with a cloth or squeegee. Leaving the surface damp undoes the work immediately.
Reapply if needed. Deep grout staining often takes two or three treatments across several days. That is normal and not a sign the method failed.
A note on timing
Dwell time is the variable that decides whether any of this works, so it is worth planning around rather than fighting.
The practical approach is to treat it as two short sessions rather than one long one. Apply the cleaner in the morning, leave it while you do something else, and come back to scrub.
Do not shower in the meantime. Rinsing the cleaner off at twenty minutes and wondering why it did not work is the most common version of this mistake.
For heavy grout staining, accept that it will take several rounds across a few days. Each treatment lifts a layer, and expecting one application to clear years of growth sets you up to conclude the method failed.
Avoid doing this last thing at night. The room needs to ventilate and dry afterwards, and a sealed bathroom at 11pm does neither.
Weekend mornings suit it best. Window open, fan on, and the rest of the day for the room to dry out properly.
Surface by surface
Grout. Vinegar or hydrogen peroxide, long dwell, grout brush. Once it is clean and fully dry, give it 24 hours and apply a penetrating grout sealer. Sealed grout resists moisture and is dramatically easier to keep clean afterwards.
Glazed tile. Anything works. This is the one surface where bleach is genuinely the fast option.
Glass screens. Vinegar handles both mould and limescale. Avoid abrasives, which scratch glass permanently and give mould a better surface to grip next time.
Acrylic or fibreglass trays. No abrasive powders, no stiff wire brushes. Both dull the finish and create micro-scratches that hold growth.
Natural stone marble, travertine, and slate. Do not use vinegar. Acid etches stone, and the damage is permanent. Use a pH-neutral stone cleaner or dilute hydrogen peroxide, and check the manufacturer’s guidance first.
Shower curtain or liner. Most plastic liners go in the washing machine on a warm cycle with a couple of towels for agitation. Hang to dry rather than tumbling. If the growth is in the hem and will not shift, a new liner costs less than the effort.
What to keep and what to throw away
A short note on kit, because the wrong tools make this harder than it needs to be.
Worth owning: a stiff nylon brush, a narrow grout brush, a squeegee, a spray bottle, and microfibre cloths. Total cost is small, and all of it lasts years.
Worth avoiding: wire brushes, abrasive powders on acrylic, and melamine foam on glass. All three scratch, and scratches hold mold better than smooth surfaces do.
Replace rather than clean: heavily mouldy shower curtain liners, old grout brushes that have gone soft, and any sponge that has been used on mould. Sponges hold spores and redistribute them.
Keep the cleaning kit out of the shower itself. A caddy inside the cubicle stays permanently wet and becomes its own growth site, which is the same reason the shampoo bottles need moving.
Store it somewhere dry and ventilated the same logic that applies to laundry room storage applies to bathroom cleaning supplies.
Caulk and silicone: the honest answer
This is where most people waste the most time when working out how to clean shower mold.
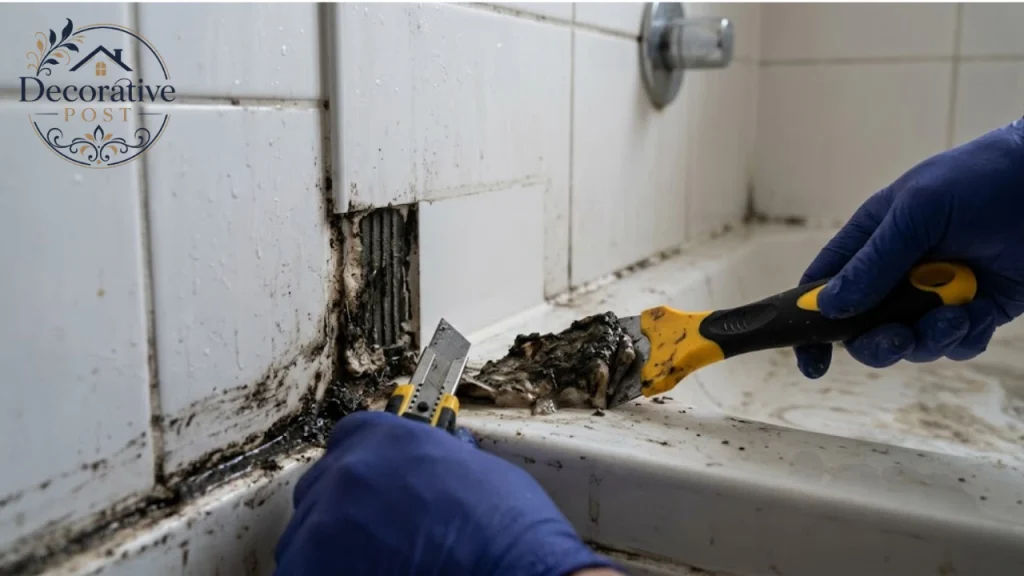
When mould appears as black specks inside clear or white silicone rather than on top of it, no cleaner will fix it. The growth is within the material, and liquid cleaners do not penetrate cured silicone.
You can bleach it pale. It will come back, because nothing was removed.
The real fix is replacement. Cut out the old bead with a sharp blade and a silicone removal tool, scrape the channel completely clean, wipe with isopropyl alcohol, let it dry fully, then apply a new bead of mold-resistant sanitary silicone.
It takes about an hour and costs very little, and it sits comfortably in the same category as the other small home upgrades that change a room out of proportion to their cost. It is also the single most satisfying bathroom job there is, and it resets the clock by several years.
One detail that decides how long the new caulk lasts: fill the tray or bath with water before you seal, and leave it full until the silicone cures. The joint then sits at its loaded position rather than being stretched every time someone steps in.
Mould on the shower ceiling
Ceiling growth almost always means ventilation rather than splashing. Warm moist air rises, hits the coolest surface in the room, and condenses there.
Clean it the same way vinegar or peroxide, dwell, gentle scrub, dry but be careful with painted plasterboard. Aggressive scrubbing removes paint and exposes a porous surface that holds moisture better than the paint did.
Once it is clean and fully dry, repaint with a bathroom-specific paint containing a mould inhibitor. If you are matching the trim at the same time, a soft white such as White Dove holds up well in a bathroom. Standard emulsion on a bathroom ceiling will fail repeatedly. Our guide to choosing a ceiling colour covers finish selection, and the sheen matters as much as the colour here matte holds moisture, a slight sheen sheds it.
If the ceiling is the only place it grows, the extractor fan is almost certainly the problem.
Why it keeps coming back
If mould returns within weeks of a thorough clean, how to clean shower mold is no longer your question. You have a moisture problem, and no product solves it.
Work through these in order.
Ventilation. Run the extractor during the shower and for 20 to 30 minutes afterwards. Most people switch it off with the light, which is roughly when it starts being useful. A timer switch is an inexpensive fix.
No fan, or a weak one. Hold a sheet of tissue to the grille while it runs. If it does not hold, the fan is not moving enough air the duct may be blocked, crushed, or terminating in a loft rather than outside.
Standing water. Shower trays with slow drainage, grout that holds puddles, a screen seal that traps water in its channel. Squeegee after every shower and the problem reduces substantially.
A leak. If mould recurs in one specific spot a corner, a particular tile, the bottom of a wall suspect water getting behind the surface. Failed grout, a cracked tray seal, or a pipe. This is the version where cleaning will never work.
Humidity generally. A bathroom with no window and a poor fan stays above the threshold mould needs for hours. A dehumidifier is a legitimate answer in that situation.
Damp towels and bottles. Towels left in the cubicle and bottles that never move both hold water against surfaces. Storage that gets things off the floor and out of the wet zone helps more than it sounds the principles in our guide to organising a bathroom cabinet apply directly.
Prevention that actually works
Five things, in order of effect.
Squeegee the walls and screen after every shower. Thirty seconds. This is far and away the highest-impact habit, because it removes the water before it has time to do anything.
Run the fan for 20 to 30 minutes after. Or open the window wide, which works but is slower.
Leave the door open afterwards so the moist air has somewhere to go.
Keep soap scum down. A weekly wipe denies the bacteria and mould their food source. This matters more for pink film than anything else.
Seal your grout annually. Twenty minutes of work that changes how the whole room behaves.
Small bathrooms struggle most, because the same amount of moisture lands in less air volume. If you are planning a refit, extraction and surface choices are worth deciding early our small bathroom vanity guide covers how layout affects airflow around wet zones, and the bathroom wallpaper guide covers which wall treatments survive in a humid room and which do not.
Adding this to a seasonal routine helps it stick. It sits naturally alongside the other jobs in our home maintenance checklist.
If you rent
This section exists because none of the pages ranking for this topic have one, and renters are a large share of the people searching it.
You can clean, squeegee, run the fan and keep soap scum down. All of that is within your control and all of it helps.
You generally cannot install a fan, replace a duct, or re-tile. Those are the landlord’s responsibility, and in most jurisdictions ventilation adequate to prevent damp is part of the obligation to maintain the property.
Report it in writing, with dates and photographs, even if you also mention it in person. A written record is what makes the difference if it escalates.
Keep cleaning in the meantime. Documented, persistent mould that you have visibly maintained is a far stronger position than mould that looks neglected.
A portable dehumidifier is the single most effective thing you can do without permission. In a windowless bathroom it genuinely changes the outcome.
When to stop and call someone
The EPA’s guidance for homeowners is that mould covering roughly ten square feet or more warrants professional remediation rather than DIY cleaning.
Beyond that threshold, call someone if any of these apply.
The mould returns within days despite correct cleaning and good ventilation, which points to water behind the surface.
You can see growth on drywall, plasterboard or the ceiling spreading rather than spotting, which suggests the material itself is saturated.
There is a musty smell with no visible source. Smell usually precedes sight, and an invisible source means it is somewhere you cannot reach.
Anyone in the household has asthma, a respiratory condition or a compromised immune system, in which case disturbing a large area yourself is not a sensible risk.
Tiles sound hollow when tapped, or grout crumbles when scraped. Both indicate water has been behind the surface for some time.
Five mistakes that make it worse
Spraying and wiping immediately. Without dwell time, you are cleaning the stain and leaving the organism.
Using bleach on grout and caulk. Bleaches it pale, feeds the roots, guarantees recurrence.
Mixing products. Covered at the top, and the most dangerous thing on this list.
Scrubbing dry mould. Dry growth releases spores into the air. Wet it first, always.
Cleaning and changing nothing else. If the ventilation stays the same, so does the outcome.
The five-minute routine that keeps it gone
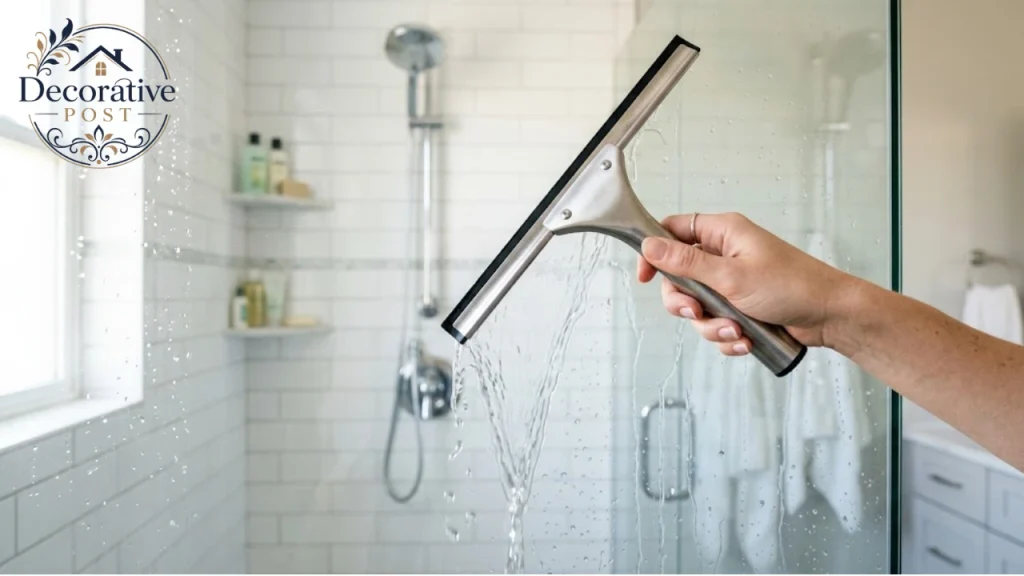
Once you have cleaned it properly, maintenance is trivial, and knowing how to clean shower mold matters far less than never needing to.
After every shower: squeegee the walls and screen, leave the fan running, prop the door open. Ninety seconds in total.
Once a week: wipe the surfaces with a general bathroom cleaner to keep soap scum down, and move the bottles.
Once a year: reseal the grout, and check whether the silicone still looks clean at the edges.
The same logic runs through the rest of the house. It is the thinking behind our guides to cleaning hardwood floors and cleaning baseboard heaters small, regular, and far less work than the alternative.
That is genuinely all of it. The deep clean above is a reset; this is what stops you needing another one.
FAQs:
What kills mold in the shower?
Undiluted white vinegar or 3% hydrogen peroxide kill most shower mould if left on the surface for 30 to 60 minutes before scrubbing. Chlorine bleach works on non-porous surfaces such as glass and glazed tile but not on grout or caulk.
Is bleach or vinegar better for shower mold?
Vinegar, for most shower surfaces. Bleach does not penetrate porous materials like grout and silicone the chlorine evaporates while the water soaks in and feeds the growth underneath. The EPA does not recommend bleach as a routine practice for mould cleanup.
How do you get rid of black mold in shower silicone?
If the mould is inside the silicone rather than on it, cleaning will not reach it. Cut out the old bead, scrape the channel clean, wipe with isopropyl alcohol, dry fully, and apply new mould-resistant sanitary silicone.
Why does mold keep coming back in my shower?
Because the moisture conditions have not changed. Check that your extractor fan actually moves air, run it for 20 to 30 minutes after showering, squeegee the walls, and look for a leak if it returns in one specific spot.
Is shower mold dangerous?
Small amounts of surface mould on tile are generally low risk for healthy people. It matters more if the area is large, if growth is spreading on plasterboard or a ceiling, or if anyone in the household has asthma or a respiratory condition.
Can you mix bleach and vinegar to clean mold?
No. The combination releases chlorine gas. Bleach and ammonia produce chloramine gas. Never combine cleaning products, and rinse thoroughly before switching from one to another.
How do you remove pink mold in the shower?
Pink film is Serratia marcescens, a bacterium rather than a mould. It wipes off easily, but it feeds on soap residue, so the lasting fix is removing soap scum regularly rather than disinfecting.
How much mold can I clean myself?
The EPA suggests roughly ten square feet as the limit for DIY cleaning. Beyond that, or where mould is inside walls, ductwork or following flooding, professional remediation is appropriate.